

Make the Niki's Butterfly knot | Tutorial
In this photo tutorial, you will see how to knot the Niki's Butterfly pattern. The Daylight knot was designed by Nicole Damer and is easy to make.
Make a beautiful creation with the paracord knot Sanctified Covenant. You can use this knot, for example, to make a collar for medium-sized dogs. In this photo tutorial, you will see how to tie this knot, along with how to start and finish your work.
In this blog post, you will see how to make a collar using the Sanctified Covenant knot from start to finish. This knot is ideal for making a collar for a smaller or medium-sized dog. This page also serves as the tutorial for the DIY kits with this knot.

Only want to see how to tie the knot itself? Then click on “Knotting of the Sanctified Covenant knot” in the table of contents or scroll down to the relevant section.
When making a dog collar, it is important that you set up your work in a safe way. Of course, you don't want the dog to be able to get loose due to an unsafe collar.
Before you can make the set-up, you must know how long it should be. The rule that you can follow with the products in the DIY kit is: circumference of the dog's neck (in cm) - 7 cm.
Are you making the collar for a dog with a neck circumference of 33 cm? Then the length of your set-up should be 26 cm (33 cm - 7 cm). In the picture below you can see which part this is.
Are you not using the DIY kit? Then you can calculate how long your setup should be in the “length calculator” tab in the MatchMaker.

Please note that these are all average values. Lengths may vary due to personal knotting styles. With this length we assume that you close the adapter at the level of the second hole. If the collar is too tight or too wide, you can easily change holes to make the collar fit.
In this tutorial, we will refer to the different strands as color 1, color 2 and color 3. In the image below, you can see which term refers to which cord.

Color 1: Mint & Burgundy Diamonds, color 2: Pastel Pink and color 3: Viva la Vino Red.
You should use the 6 m cord in the DIY kit as color 1, the 5 m cord als color 3 and the 3 m cord as color 2.
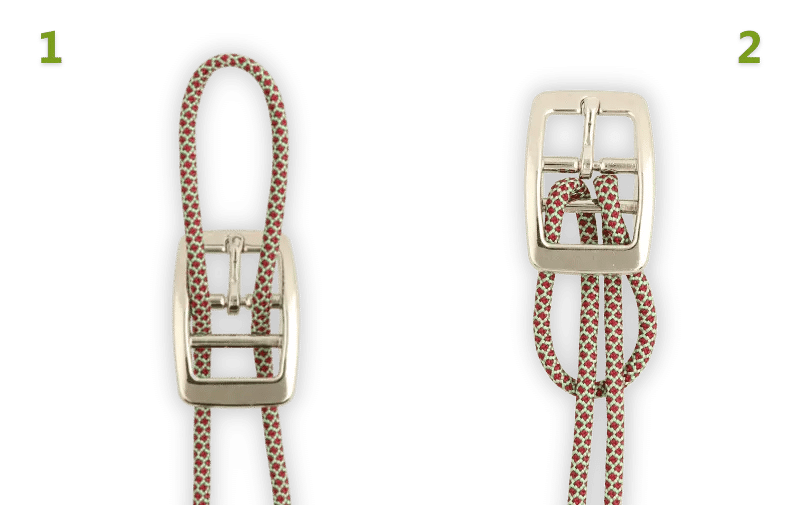
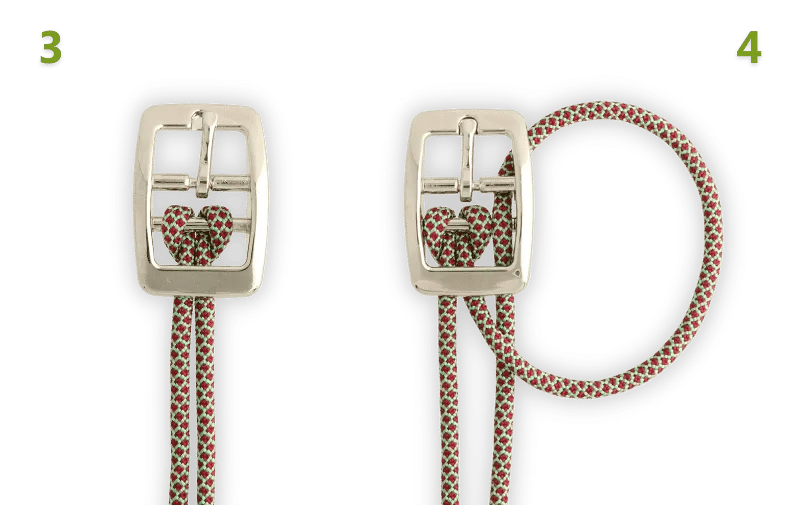
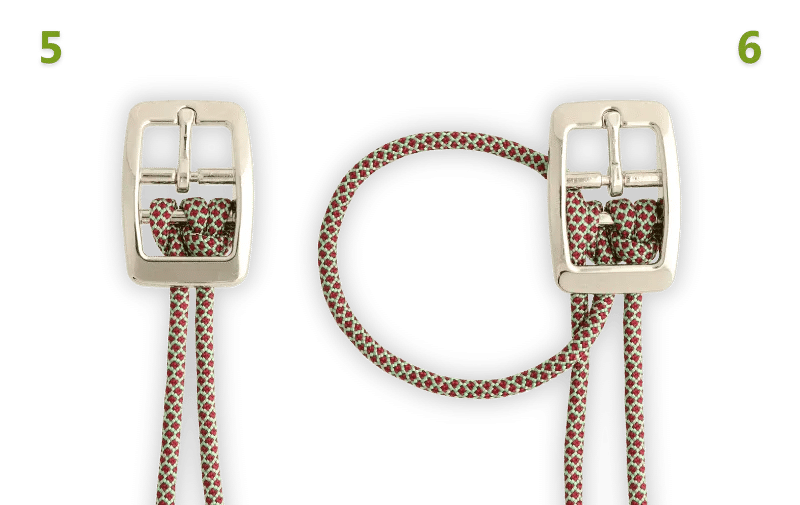
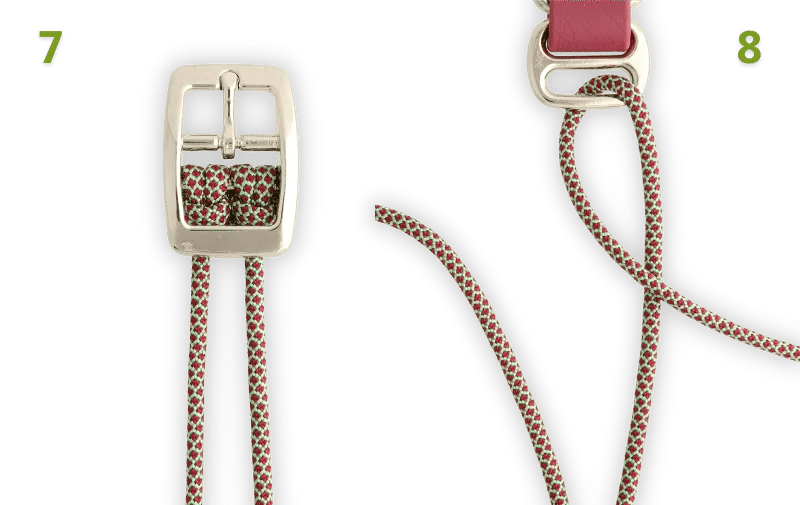
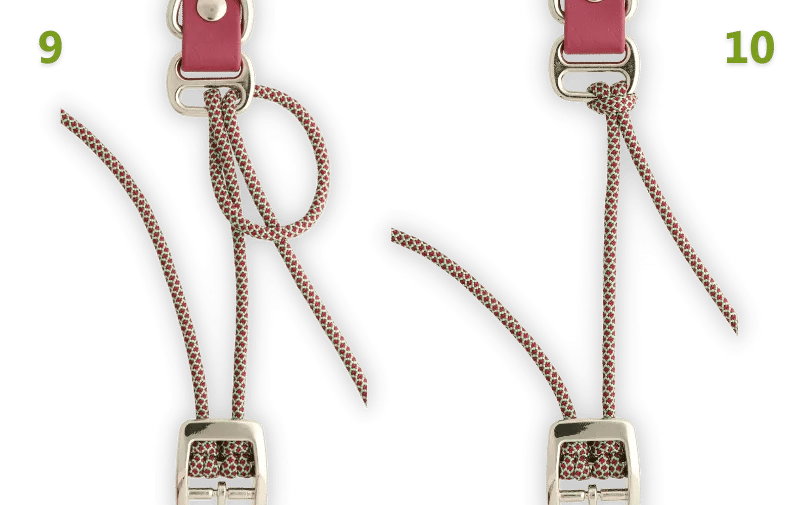
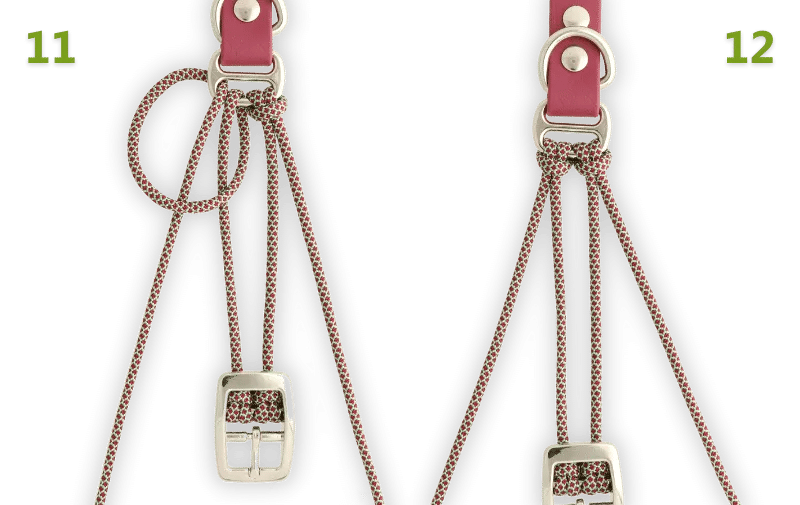
The setup itself is now finished. Make sure it is the length that you calculated before. Check this again before you start to tie the Sanctified Covenant.


In the video below, you can see how to add color 2 and 3 as well.


Repeat the same knot until you have knotted the length you need.

As with the setup, it is important that the finishing of a collar is secure. Here's one way you can do this.
It is practical to use a paracord needle while finishing, but it is not required. You could also use an alternative tool, like a crochet hook or a marlin spike.


Your collar is now ready. Have fun using it!
In this photo tutorial, you will see how to knot the Niki's Butterfly pattern. The Daylight knot was designed by Nicole Damer and is easy to make.
We couldn’t resist the cute bag charm trend. Make your own leather bag charm with our kangaroo or nappa leather. Follow our tutorials and create your custom key ring bag charm!
In this photo tutorial, you will see how to knot the Luna’s Caramella pattern. The Luna’s Caramella knot was designed by Saskia Meißner and is of intermediate level.
Want to make your own colorful dog leash from BioThane and paracord? BioThane is a strong, water-resistant and easy-to-clean material - ideal for a dog leash! In this blog, we explain step by step how to make your own leash. Using a clear pattern, you can easily determine the right size of the handle and mark the holes in the right place.
Make your own custom and colorful collar from BioThane and paracord! BioThane coated webbing is a strong, water resistant and easy to clean material, perfect for a collar. Here is a step-by-step guide with video tutorial for making an adjustable BioThane dog collar finished with paracord.
In this photo tutorial, you will see how to knot the Luna's Uncrossed pattern. The Luna's Uncrossed knot was designed by Saskia Meißner and is difficult to make.