When making a dog collar, it is of course important that the dog actually will fit the collar. And maybe you've never thought about it, but the thickness of the knot has a major influence on the size of the collar.
Why is the knot thickness important?
The thicker the collar, the smaller the circumference of the inner edge will be in proportion. This can be compared to stretching and bending your hand. When you bend your hand, you will see that your skin tightens on the outside and that there are more wrinkles on the inside.
This also works with collars: when the collar is fastened, the outside is tighter and the material on the inside comes closer together.
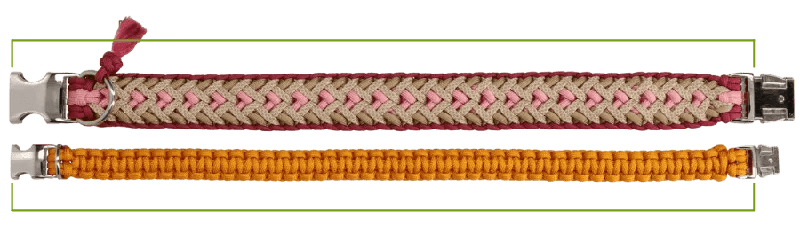
As you can see in the picture above, the two collars are the same length when lying flat and straight on a surface. Here you are looking at the total length, without counting the pin of the male side of the buckle.
The picture below shows that when you fasten the collars and measure them (in this case with a measuring tower), the upper band has a smaller inner dimension (42 cm) than the lower band (44 cm). This is because the upper collar is thicker due to the knot.

Other factors
The thickness of the collar also depends on the precision with which it is knotted: if you make a lot of mistakes, the thickness of the collar can turn out differently. The way in which you are finishing off the collar, or the addition of extra elements such as beads, also influence the thickness of the final dog collar.
Another element to consider is how tightly you knot. If you tie it very tightly, the collar will bend less easily and it will be smaller on the inside. The set-up and the finish have the same effect: with a wide set-up, more rope is used and so the starting part is thicker. The same applies to the finish. This in turn results in a smaller inner size.
What thickness is your knot?
Many knot instructions indicate the average thickness of the knot. That's great, because you can use this value in the jig formula (Neck circumference + (3.14 * knot thickness in centimetres) = total length). Here you will find more information about the jig formula.
Do you have a lot of experience with knotting? Then you can probably estimate how your personal techniques influence the thickness (personal deviations are about a few millimetres at most, it is never a centimetre or more).
But are you still unsure how the knot will turn out with your knotting technique? Then it's best to tie a test piece.
Measuring your knotwork
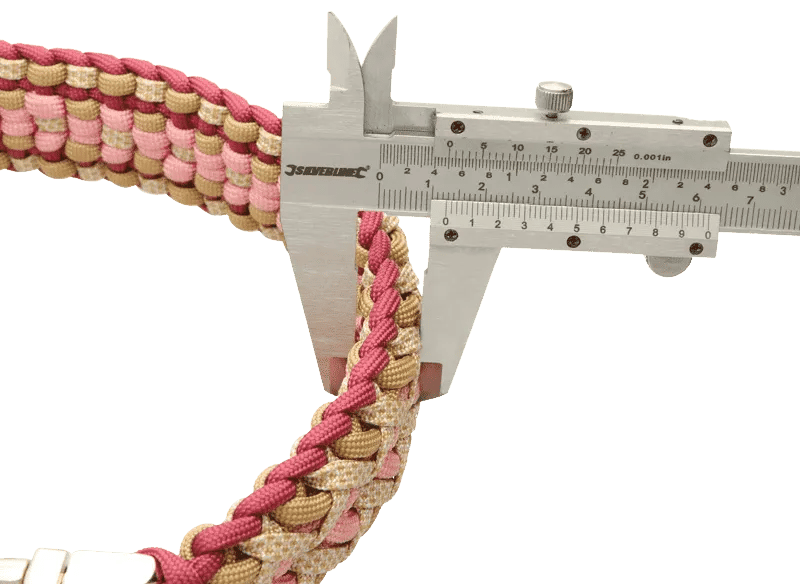
Tie a piece of 10 centimetres, so that you can measure yourself how thick the knot will be when you tie it. The best way to measure is to use a vernier calliper. Slide the vernier calliper so that the test piece fits between it without applying pressure. Then read the thickness.
No calliper at hand? Then you can also measure this by placing the test piece on the edge of a table. Place a hard, but light and thin board (wood or a sturdy piece of cardboard) on it.
Place the board on it without pressing and make sure it is straight. Then measure the distance between the table and the board with a tape measure or ruler. This allows you to read the thickness more accurately than when using only a measuring tape.
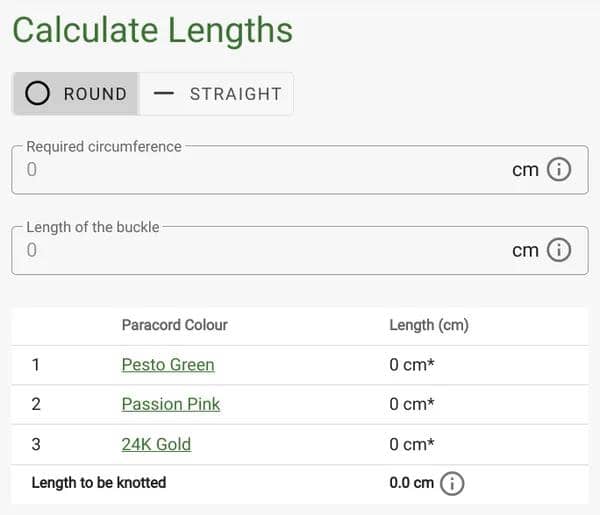
Calculate collar length
Now that you know what the thickness of the knot will be when you tie it, you can use this value to calculate how long your collar should be using the jig formula. In addition you can check how many centimetres of each rope you have used and then calculate how many metres you need for each color.
You can also use the calculator tool for this: it calculates the required lengths per color for you. You can find this tool in the Matchmaker.