


Make the Niki's Butterfly knot | Tutorial
In this photo tutorial, you will see how to knot the Niki's Butterfly pattern. The Daylight knot was designed by Nicole Damer and is easy to make.
Do you want to braid a dog leash of Paracord yourself? Here you find instructions, photos and videos for the braids Kara Yatsu, 4 Strand Round Double Braid and the Herringbone.
Did you buy a Paracord DIY kit 'Make your own dog leash'? On this page you will find the instructions for braiding this leash. You can, of course, also make these braids without this kit, you can find the materials you need on the product page.
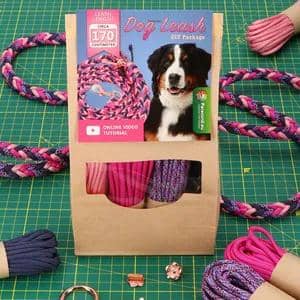
With the materials in the kit you could use countless different braiding patterns. Instructions for these 3 braids are given here:
At the end it will be explained how to finish your dog leash and how to make a keychain with rope leftovers.
Kara Yatsu is a braid which is made with a Kumihimo disc. Kuhimino is a traditional Japanese art form of making braids and cords. In this video you will learn how to braid the Kara Yatsu with 8 strands of Paracord and a Kumihimo Disc. It is convenient to have the tools below at your hobby table.

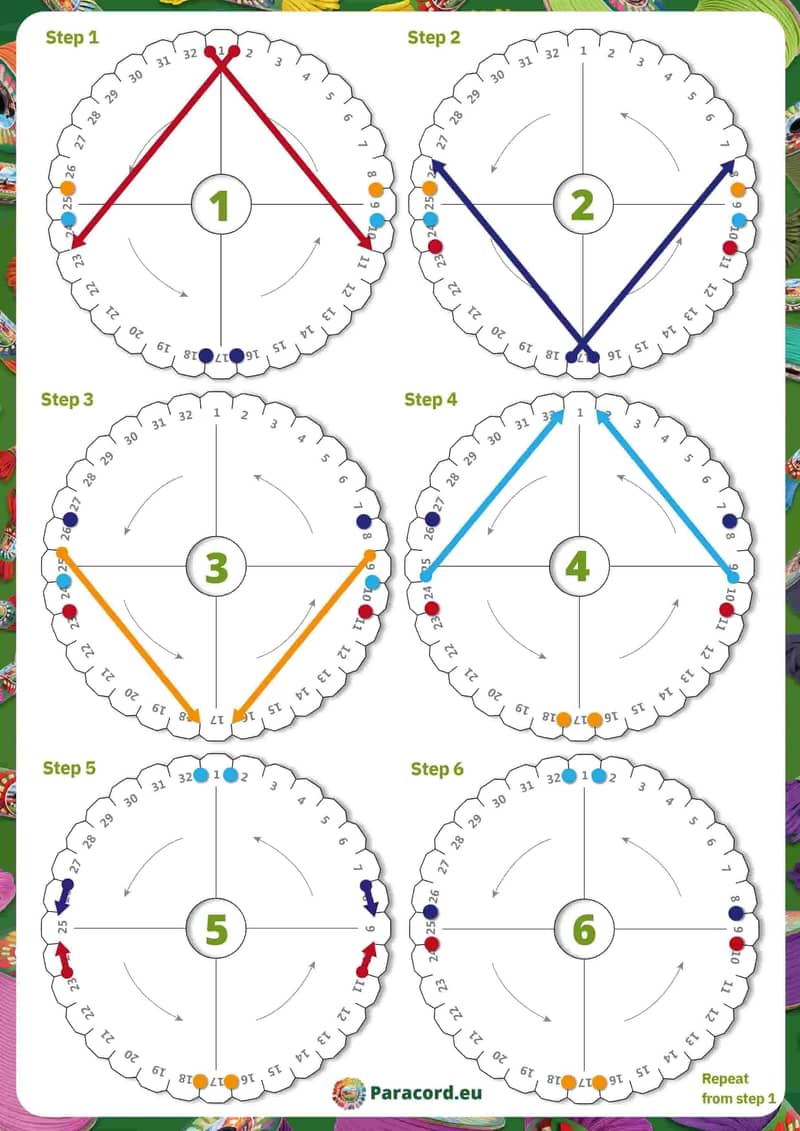
You can download the Kara Yatsu instructions here.
Check out the Kara Yatsu braid in the MatchMaker!
The Herringbone braid is a rectangular design with four sides and can be used in various projects. This braid is suitable for macramé, jewelry making, bracelets, dog leashes and so much more! 'Herringbone' is popular because it is easy to braid and learn and it can be used for many projects.
To make the Herringbone braid, the tools below will be useful.

Check out the Herringbone braid in the MatchMaker!
This braid is ideal for a variety of projects. It is most commonly used to braid dog leashes, but it is also often used in the equestrian world. This braid is round and lies comfortably in the hand.
To make this 4 Strand Round Double Braid we advise you to work with the following tools.

Check out the 4 Strand Round Double Braid in the MatchMaker!
The finishing of the dog leash can be done in different ways.
Thread the bead onto the rope. Cut it to the length of your choice. Slide the bead to 0.5cm from the end. Heat the end and press it flat against the bead using, for example, a teaspoon.
Cut off all remaining strands as short as possible. Now heat all the ends and push them as far as possible into the diamond knot so you see it as little as possible.
Cut the strands to the length of your choice and fray them. You can do this with a sharp object (for example a Paracord needle). You can see an example of this in the Herringbone tutorial.
Do you have any cord left after finishing? You can then choose to make a (key)chain out of the left over strands. It is up to you how many strands to use.
The video shows how to make a keychain with 4 strands (i.e. two ropes because they are folded in half). If you take 4 ropes (and thus work with 8 strands), you can follow the same tutorial by working with 4 pairs instead of using all 8 strands separately.
In this photo tutorial, you will see how to knot the Niki's Butterfly pattern. The Daylight knot was designed by Nicole Damer and is easy to make.
We couldn’t resist the cute bag charm trend. Make your own leather bag charm with our kangaroo or nappa leather. Follow our tutorials and create your custom key ring bag charm!
In this photo tutorial, you will see how to knot the Daylight pattern. The Daylight knot was designed by Silke Engels and is of an intermediate level.
In this photo tutorial, you will see how to knot the Cambio pattern. The Cambio knot was designed by Annet Eul and is of an intermediate level.
In this photo tutorial, you will see how to knot the Luna’s Caramella pattern. The Luna’s Caramella knot was designed by Saskia Meißner and is of intermediate level.
Want to make your own colorful dog leash from BioThane and paracord? BioThane is a strong, water-resistant and easy-to-clean material - ideal for a dog leash! In this blog, we explain step by step how to make your own leash. Using a clear pattern, you can easily determine the right size of the handle and mark the holes in the right place.