


Make the Niki's Butterfly knot | Tutorial
In this photo tutorial, you will see how to knot the Niki's Butterfly pattern. The Daylight knot was designed by Nicole Damer and is easy to make.
This blog gives a step-by-step explanation of how to make a Paracord bracelet with the cobra knot. You can also use this knot for other projects such as collars or horse halters.
Before you start tying the knot, it is important to know that if you're using the cobra knot for a project where an animal needs to be tied up, it is best to work with 1 color (i.e. a single continuous piece of rope). If you decide to combine two colors, you can do this by using the Manny Methode. Just burning them together is really not strong enough.
This tutorial focuses on Paracord Type III.
What you need:
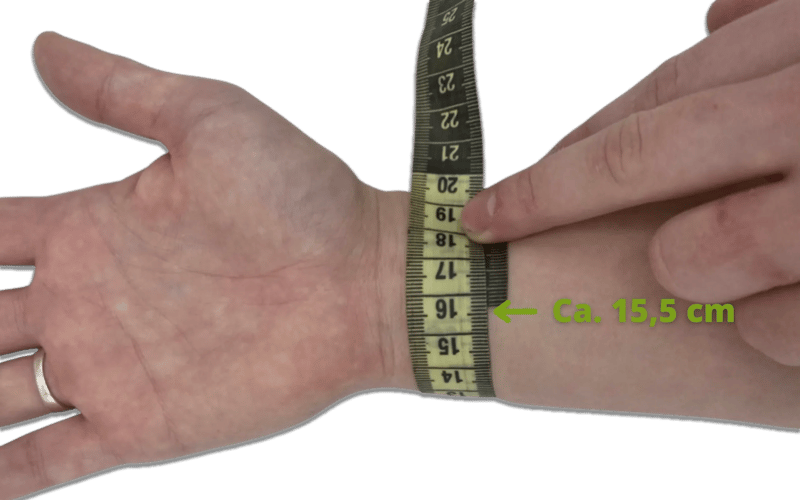
Measure the size of your wrist. Now go to the length calculator tool and enter your wrist size and the length of the buckle. Below you can see the values I have entered: 15.5 cm wrist size, 3 cm buckle size.
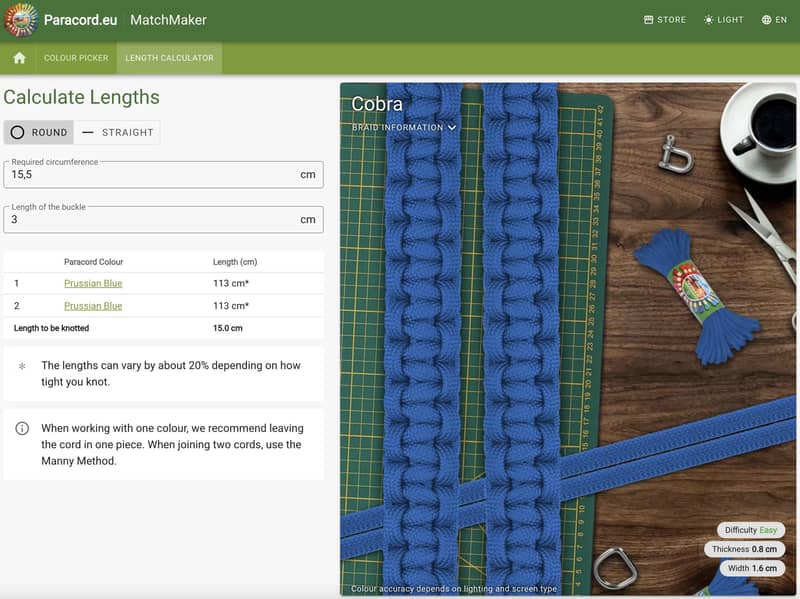
This means I need 113 cm of rope per color to make this bracelet. If I make the bracelet in 1 color, I will need 226 cm (2 x 113 cm).
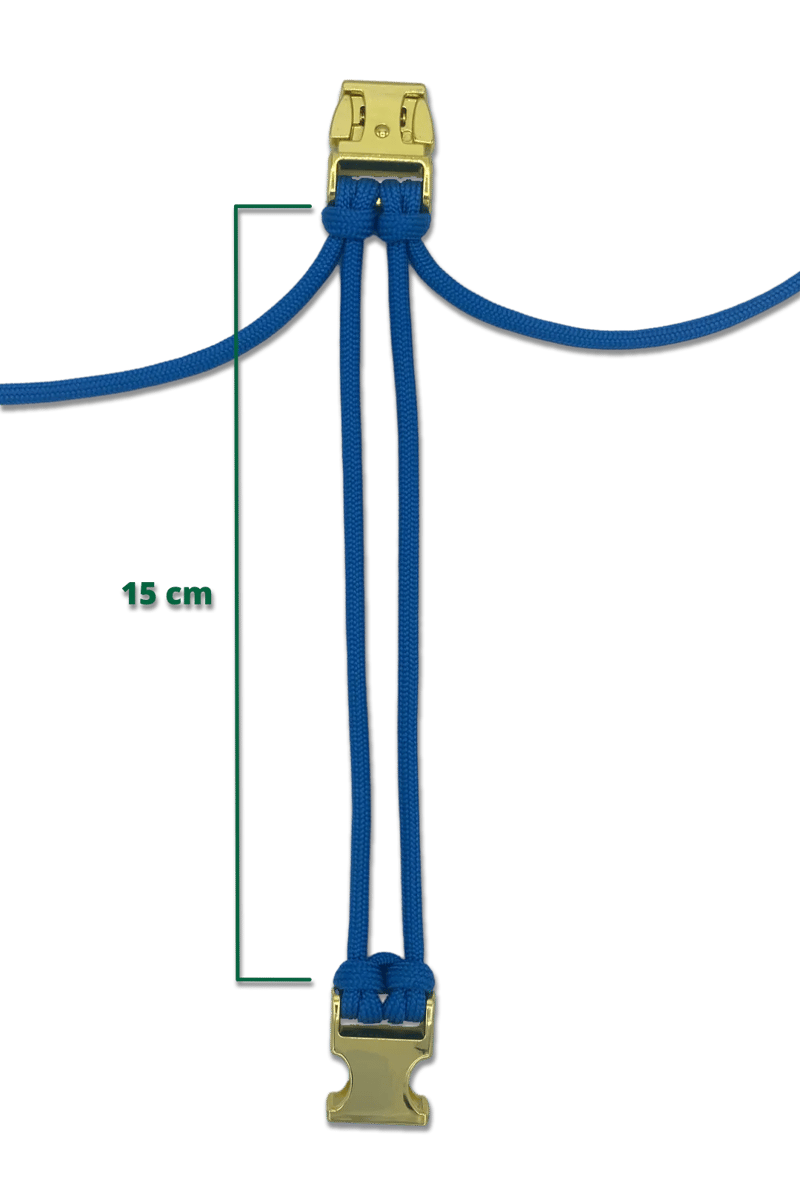
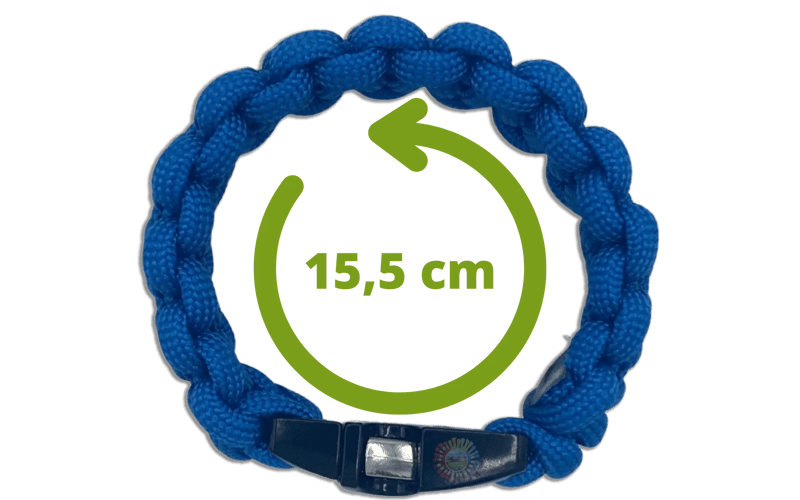
In this case, the cast-on length, or 'length to knot’, is 15 cm. This means the part I will actually knot (i.e. the part between the two parts of the buckle) must be exactly 15 cm.
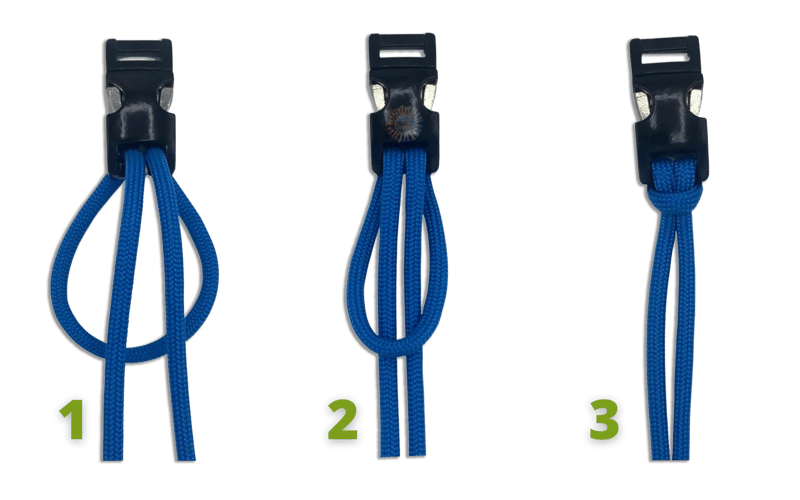
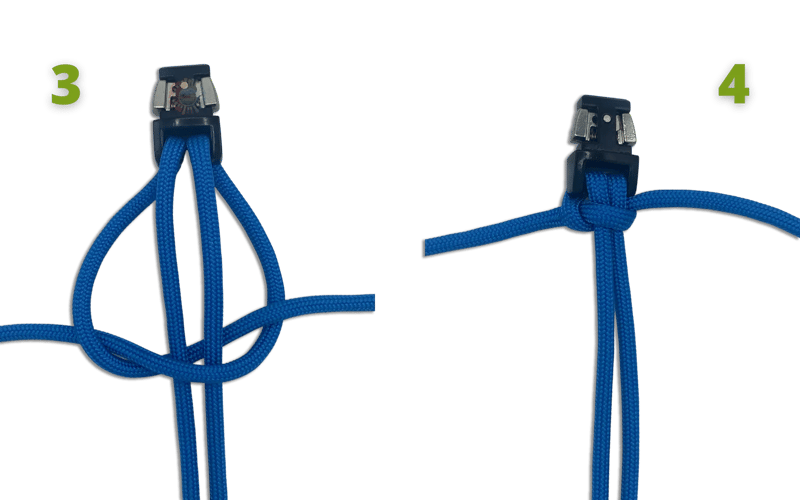
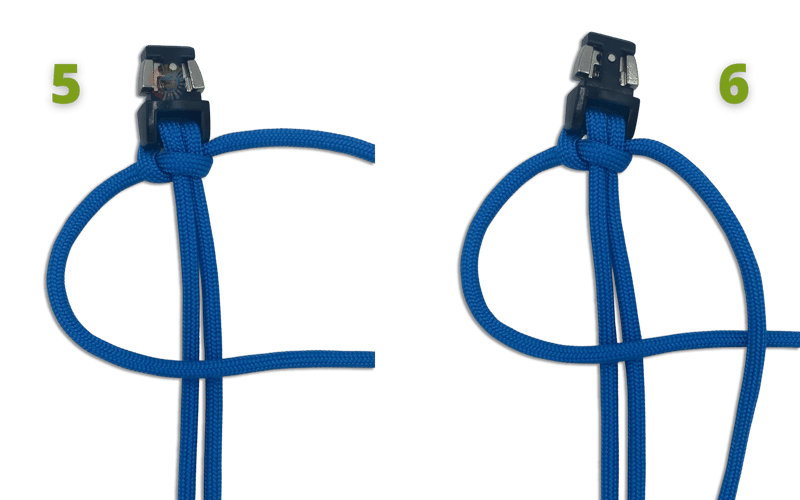
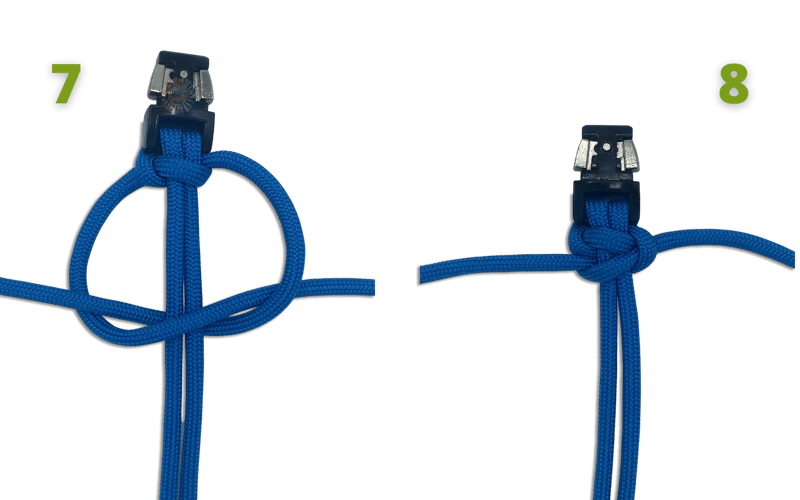
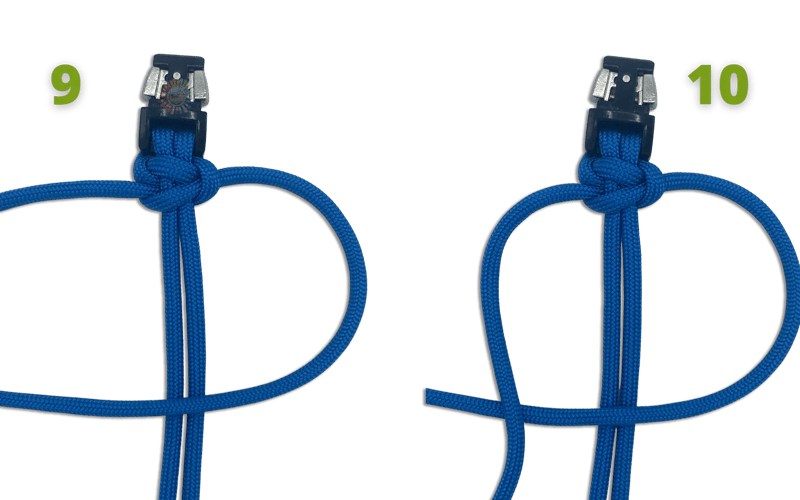
The setup for this knot can be done in a number of different ways. I will explain 2 different ways which are suitable for a buckle.
This setup is nice when using a small buckle (3/8" buckle) that has a feedthrough of, for example, 10 mm. Because this is quite an easy setup, I also recommend using this way for children.
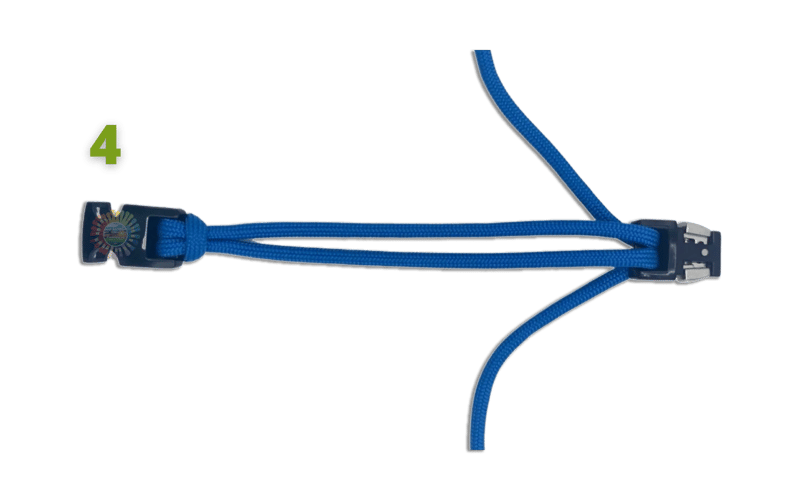
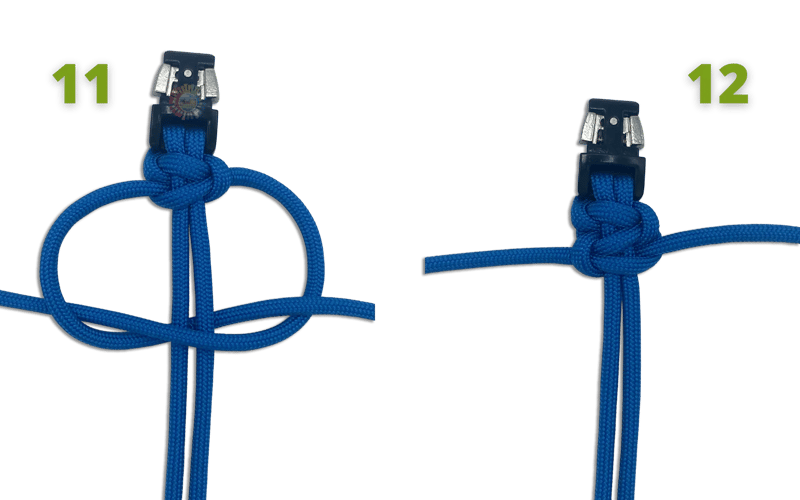
Personally I like this setup best with this knot, as the buckle fits nicely with the knot work. You will need a bigger buckle for this than for Way 1. A buckle with a 16 mm feedthrough (5/8" buckle) is ideal.
Here you can find the instructions to make the single setup or Kosmetik 2.0.

Tip: always measure before you begin knotting. I've often made the mistake of not measuring, which has led to frustration later on. Prevent this by double-checking whether the sizing is still correct.

Before finishing, you must (as you may have guessed) measure again! This way you can still go back if the size is wrong, so be sure to check ;)
Is the size right? Great!
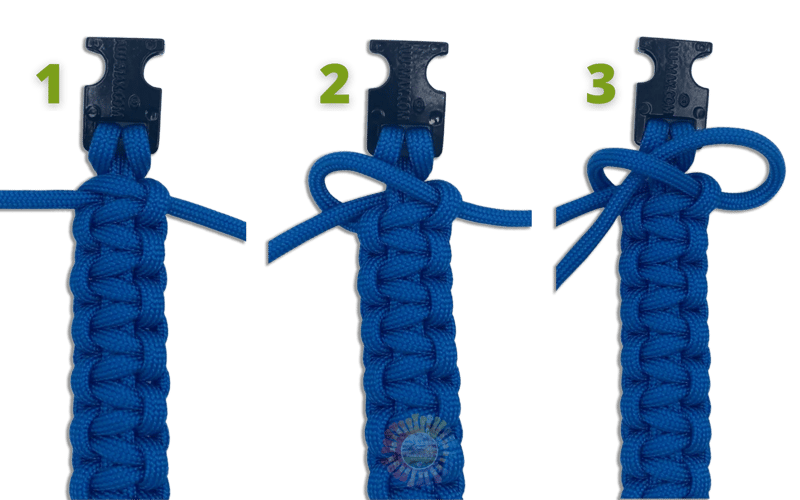
You can now use a 'clean finish' to complete the bracelet. Take a good look at the images below or watch the tutorial:
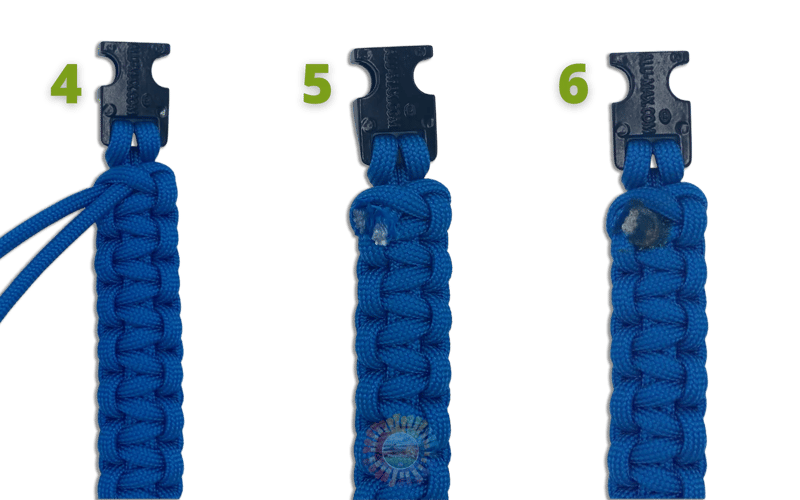
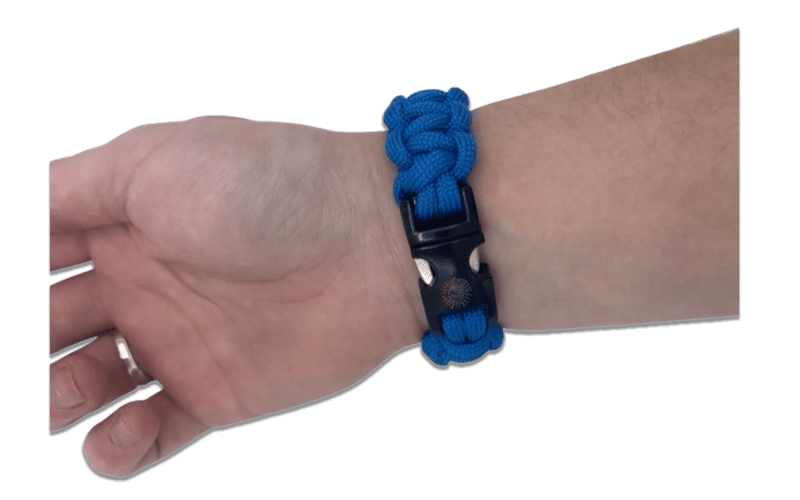
Was the finishing successful? Then your Paracord bracelet is now complete!
In this photo tutorial, you will see how to knot the Niki's Butterfly pattern. The Daylight knot was designed by Nicole Damer and is easy to make.
We couldn’t resist the cute bag charm trend. Make your own leather bag charm with our kangaroo or nappa leather. Follow our tutorials and create your custom key ring bag charm!
In this photo tutorial, you will see how to knot the Daylight pattern. The Daylight knot was designed by Silke Engels and is of an intermediate level.
In this photo tutorial, you will see how to knot the Cambio pattern. The Cambio knot was designed by Annet Eul and is of an intermediate level.
In this photo tutorial, you will see how to knot the Luna’s Caramella pattern. The Luna’s Caramella knot was designed by Saskia Meißner and is of intermediate level.
Want to make your own colorful dog leash from BioThane and paracord? BioThane is a strong, water-resistant and easy-to-clean material - ideal for a dog leash! In this blog, we explain step by step how to make your own leash. Using a clear pattern, you can easily determine the right size of the handle and mark the holes in the right place.